ONE PHOTO. YOUR SHARED MEMORY.
A Friendship Photo Case Starts With the Right File
Photo DIY · $35 per case
Create your friendship case →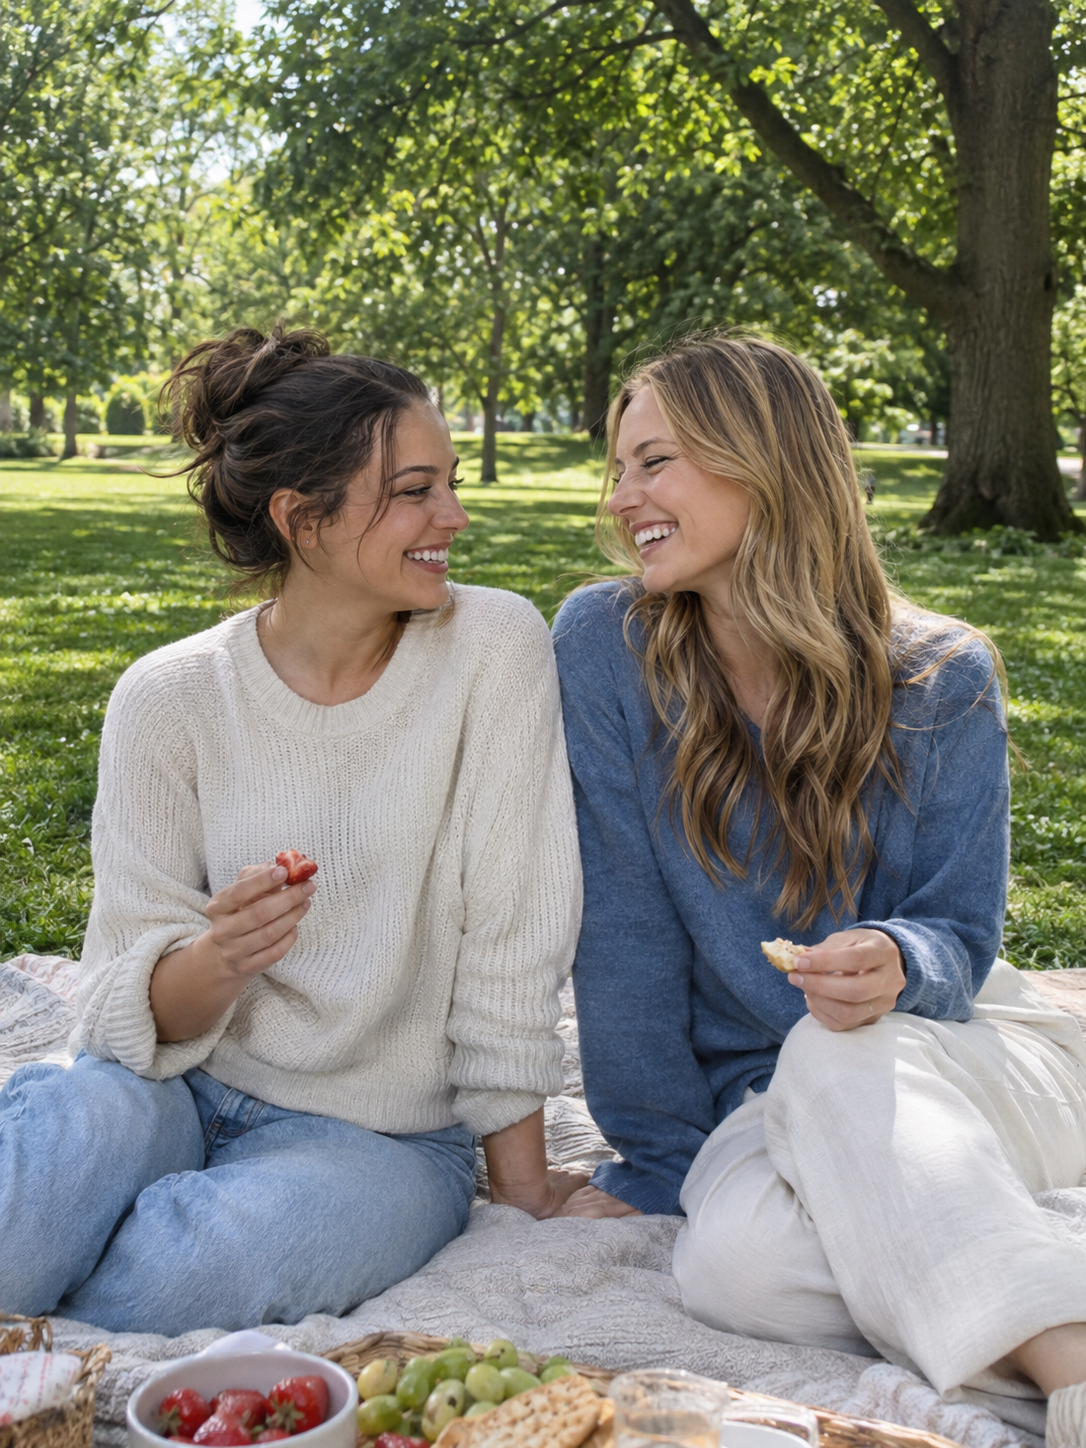
You probably already know which picture you would choose: the picnic, the weekend away, or the ordinary afternoon that became a favorite memory. A friendship photo case can start with that single image. Before you upload it, find the actual photo file your friend shared, rather than taking a screenshot of the conversation around it. That gives you a cleaner starting point and keeps chat bubbles, names, and app controls out of the artwork. Falacase phone photo DIY currently costs $35 per case.
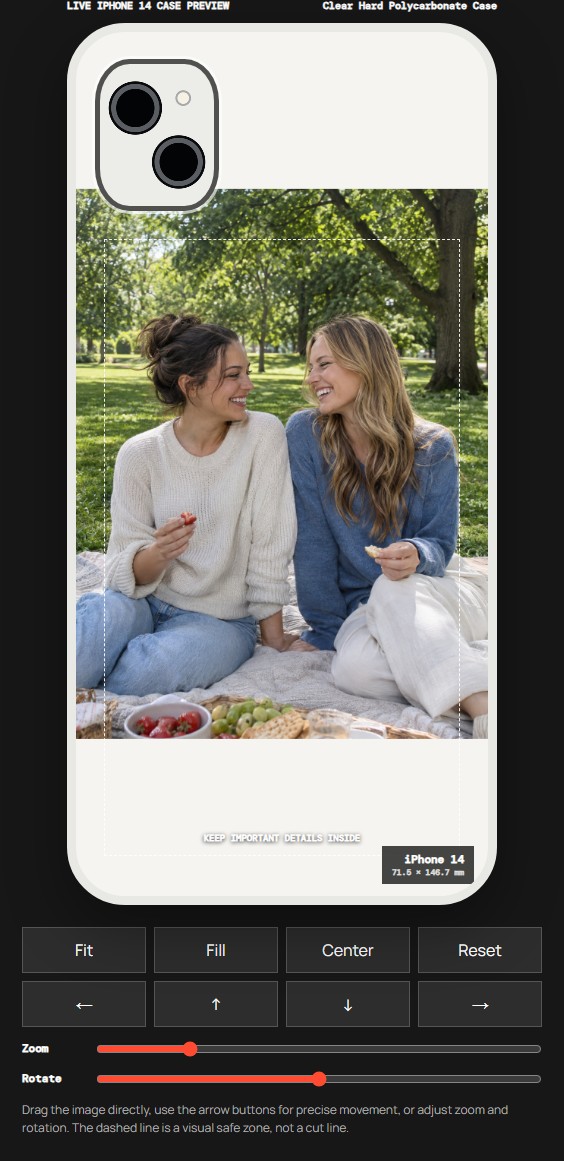
Create your friendship photo case once you have the file and the recipient's exact phone model. The two images above show an AI-created example photograph and its placement in the actual Falacase editor. The people are fictional, and the case view is an editor screenshot rather than a photograph of a printed product.
Find the photo behind the message
If your friend sent the picture in a chat, look for a way to save the photo itself. A screenshot of the whole conversation may include smaller image dimensions, interface elements, and private details that you never meant to print. Even a tightly cropped screenshot cannot recreate image detail that was missing from the copy on your screen.
When the saved image looks soft or very small, ask your friend for the original from their photo library. You can explain that you are making something with the picture and need a good copy. A file-sharing method that preserves the original is a useful option. The exact controls depend on the app and device, so check the file you receive instead of assuming every attachment has the same quality.
An original file is a better starting point, but it is not a guarantee that a blurred or poorly focused photograph will print sharply. Open it on your device and look at the faces and the detail you care about. If those already look unclear, consider another picture from the same day before spending time arranging the design.
Choose the memory your friend would enjoy carrying
Some photos are funny in a private conversation but less comfortable on an object other people can see. Pick a picture your friend would be happy to use in everyday life. Check that everyone shown is comfortable with that use, especially if you plan to share a photo of the finished gift online later.
The image does not need to be a formal portrait. A relaxed moment can make a lovely design when the people are easy to recognize and the background is not doing all the work. In the example, the two friends are close together near the center. That gives us room to position both faces as a group. Your own photo may need a different crop or a different arrangement, so use the preview to make that choice.
See what happens in the real editor
For this example we selected iPhone 14, Clear Hard Polycarbonate Case, and Manual Adjust → Fit. The editor keeps the shared scene inside the tall case preview, including both people and part of the picnic. There is space above and below the photograph because the source image has different proportions from the case area.
The source-to-preview pair is useful because you can compare the same moment at both stages. Check that the people you want to keep are still recognizable and that a camera opening is not covering a face. The camera shape and dashed guide belong to the editor interface. They are placement aids, not marks you should place in your uploaded file.
Fit does not promise a white printed border on a clear case. The appearance of unprinted areas depends on the selected material and how the design is produced. If you have a specific idea about clear space, background color, or coverage, ask the studio to confirm it before you pay.
Turn your file into your own design
In the Falacase DIY studio, select the recipient's complete phone model and the case option you want. Upload the photo you saved, then review the preview. Manual Adjust lets you move, zoom, rotate, and compare Fit with Fill. Keep both faces in view as you work. Enlarging the photo can crop away someone at the edge, even when the rest of the design looks good.
You can stop at a simple single-photo layout. If you want a date or a short message to appear as part of the artwork, prepare that as part of your image first or discuss layout help through Studio Arrange. This example does not demonstrate an in-editor text box, and it does not require you to make a collage.
Keep a copy of the original photo and any separate edited artwork on your device. A design preview is helpful for reviewing placement, but it is not a substitute for keeping the source file. If you ask the studio for help, describe the important detail clearly: for example, that both people should remain visible and the picnic setting should still be recognizable.
Check the practical details before giving it
The studio lists Clear Hard Polycarbonate Case and Clear Flexible TPU Case among its material options. Read the current descriptions and confirm the material and model combination you want. Do not assume that a pictured ring, a clear back, or a similar model name proves a particular feature or fit. If you need a different material, the studio's WhatsApp contact is the place to ask about the available choices.
The current phone photo DIY price is $35 for one case. Check the design, model, material, quantity, delivery information, and checkout total before payment. If the gift needs to arrive for a particular occasion, ask about the current production and delivery estimate. Review the current shipping and returns policy before deciding to order.
You can add a separate note about the day in the photo when you give the case. That keeps the picture easy to enjoy without asking a small printed design to explain the whole story. Start with the file you both recognize, make one clear layout decision, and see your friendship photo in the studio.
Before you start
Should I upload a screenshot of the chat containing the photo?
Save the actual photograph when possible. A conversation screenshot can include private details and a smaller image. Ask your friend for the original if the saved copy looks small or soft.
Will an original file always make a sharp print?
No. Focus, motion blur, image detail, size, and the chosen crop still matter. Inspect the photo and ask the studio about a file you are unsure of.
Can I add a date or message to this photo design?
Prepare the text as part of your image before upload or discuss layout help through Studio Arrange. This example does not demonstrate an in-editor text box.
Are the example people customers?
No. They are fictional people in an AI-created source image. The case view is an actual editor screenshot, not a customer testimonial or a finished printed order.